

Saturday, 15 August 2015
Family Reunion Chalkboard Paper Banner
Cameo is the greatest tool in cutting out shapes for banners. I just cut them out then used a Marvy Bistro Chalkboard Marker to do the lettering and added a bit of twine. My lettering isn't the greatest but this made for a pretty instant banner for our reunion in Lehi, Utah.

Baby Shower
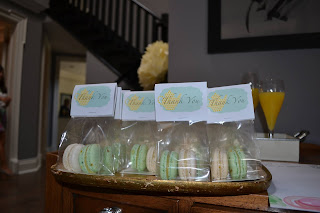
I recently helped a friend work on a few things for a baby shower. The sex of the baby is unknown so the colour scheme is yellow and mint. We decided to use a onesie for the banner. Quite happy with how it turned out.


I also made headers for macaroons in yellow and mint.


I also made headers for macaroons in yellow and mint.


Saturday, 1 August 2015
August 1, 2015
Happy Birthday to my wonderful husband. I am so blessed to have him in my life, we just have the "most muchester" fun together. I am always shocked at how fast the birthdays seem to roll around. We need to find more opportunities to stop and enjoy life - to let it slow down for just a few minutes.
This is his card and he hasn't seen it yet, very excited to give it to him. He is my own private pop star and I wanted to make him a card that would reflect his love for music playing the guitar.
I couldn't find a Gibson font anywhere so I traced lettering to create one, I have used it for both print and cut and for cutting vinyl.

I used silver metallic vinyl for the lettering and numbers. The Happy Birthday, also in a Gibson font is printed on the base of the card. I used my Silhouette Cameo to make sure everything was lined up and the Happy Birthday would show through in the right spot. The lettering on the pic is also in silver vinyl. The silver metallic threads are held into place with Scraperfect's Best Glue Ever.

Wednesday, 1 July 2015
Happy Canada Day

Happy Canada Day
Today I am posting a recipe for Rice Krispie treats that I made for a Canada Day Celebration. If you are ever going to eat Rice Krispie Squares - this is the time to do it.

Rice Krispie ~ Caramel Topping
1/2 c margarine
375 gram bag of mini marshmallows
9 c Rice Krispies
(you can do this in the microwave, I prefer stovetop)
This is for a 9 x 13 pan ~ I found this was too deep.
I use a jellyroll pan or large cookie sheets.
Toffee
1 C margarine or butter
1 c brown sugar
4 Tbsp white corn syrup
1 can eagle brand milk
Melt stirring constantly
boil for 10 minutes
let cool for 10 minutes then pour over cooled Rice Krispie squares |
Sunday, 28 June 2015
Copic Marker Storage and Organization
It has been a while since I have posted how I organize my marker collection.
My Copic collection started several years ago with 5 Ciao markers from Curry's because that was all I could find in Toronto, my Ciao collection grew to 18. Once Michaels started to carry Copic Sketch Markers, my collection started to grow rapidly and I was no longer interested in Ciao markers (link at the bottom of the page for Sketch vs Ciao.) In Canada the price per marker is 7.99 -- the handy Michaels coupons of either 40 or 50% off fed my addiction and on trips to the US or at scrapping events, I would grab colours that Michaels didn't carry.
In the beginning, I tracked colours in a small notebook and then purchased a colour chart book from Curry's - I needed something to keep in m purse that would remind me which colours I had.
Sketch & Ciao Markers
72 Slot Wallets
Colour Charts

Raskog Cart
Master Colour Charts
The Copic site has the best hand colour chart you can find it by clicking on this link: 358 Hand Colour Chart
Original Markers
I have decided to store my Original Copic Markers in a 36 Slot Copic Wallet. I can't see myself collecting more than this for the Original Copic Markers.

36 Slot Copic Wallet
Wide Markers
For now because I only have 8 Wide Markers, I am going to just store them in a Blue Que Pencil Case that I purchased from Curry's.
Various Ink Refills
I have yet to find a good storage solution for my Various Ink Refills. I have them stored in aBlue Que Pencil Case that I purchased from Curry's.
Previous Copic Posts
Labeling Copic Markers
Copic Watercolour
Sketch vs. Caio
Saturday, 2 May 2015
Happy National Scrapbook Day
Happy National Scrapbook Day everyone!
How are you going to celebrate the day?
I am heading to Lehi, Utah to spend the afternoon with Lisa Bearnson and Team Lisa. I will post photos later.

Tuesday, 24 March 2015
April Pocket Letter

This has been a fun one. Under the Pokemon cards and stickers I have a Pokemon design that says Happy Easter cut up to fit the pockets. When my grandson removes all of the fun stuff he will still have a picture to see.

I have to go get this off in the mail so it will arrive on time.
He loved his March Pocket Letters - looking forward to creating many more.
Sunday, 15 March 2015
Pocket Letters for Grandkids
My grandchildren live across the country from me and my oldest has just turned 5. It was a thrill to hear how stoked he was with the homemade Lego card and Toys R Us gift card. I started thinking about sending him something to open in the mail every month. A couple of weeks ago a friend told me about a new thing that she has become addicted to called Pocket Letters. This is the perfect thing to send to my grandson.
 March 2015 Pocket Letter
Since then I have been on the hunt for relatively flat things that will fit into the pockets of baseball trading card pages. I have set up a binder with several pocket pages and have started to collect things with monthly themes to go in each pocket. So far I have partial pages to take me up to next February. The challenge will be to find things very flat that can easily be mailed in a No. 10 envelope.
March
Pokemon cards
Stride lime gum
Star Wars stickers
Lego Mini Figure
1" flair buttons
MineCraft stickers
Sunday, 1 March 2015
Shabby Mini Album

I have been thinking about different acrylic stands available at Michaels for a long time. Originally I wanted to make a mini recipe book with the 4 x 6" stands but feared that the sturdiness of them wouldn't be able to handle the weight of the paper and binder rings - I kept picturing them toppling over.


Several months ago when I was standing in front of the Acrylic Basics section in Michaels Framing departments it hit. Flip the frame down and use Tim Holtz Idea-ology Ring Binders.
I drilled holes in the centre of the acrylic to line up with the Binder Rings. I placed a block of wood behind the acrylic to stabilize it and keep it from cracking. The binders stay in place with brads that come with them. Before pushing the brads through, I inserted a polkadot piece of recollections paper. Once the brads were in place I had a cute little mini album that won't topple over.
I cut several tabbed and pocket pages to create my Shabby Mini Album. I added some small watercolours and Project Life cards.

I used:
8 x 10 Acrylic Basics from Michaels
Tim Holtz Ring Binder (2 per pkg)
American Crafts Crate Paper Stack

Recollections polkadot paper
Heidi Swapp Project Life cards - Foil Kit
Drill & a block of wood.
Saturday, 14 February 2015
Valentine Gift 2015
Every Valentine's Day I try to find something special for my husband. He was in the music industry when he was young and I found this red 45 adapter in his things. Normally these adapters were yellow plastic. I thought this would be something that would be fun to frame.

I used silicone sealant to mount the adapter onto a linen canvas art board and opted for no glass for my float mount.
I used silicone sealant to mount the adapter onto a linen canvas art board and opted for no glass for my float mount.
Thursday, 12 February 2015
Valentines in Project Life Pages
As Valentines Day approaches, don't throw away your Valentines, they can be fun to look after the years pass. A fun place to save some of your or your children's Valentines is to put them in Project Life pocket pages. I have opted for Design F for my vintage Valentines.

If some are too large, you can split them up into two pockets (depending on which page design you choose.) You can also scan them and shrink them to size.
I think kids Valentines from this year will be full of Frozen cards.
Thursday, 1 January 2015
January 2015 - Happy New Year
I can't believe that January has rolled around so quickly, it seems as thought I just got use to writing 2014.

Last year I listed a few of my fave things that have helped save me time and space with my organizing. Since then I have added a few new things to my ever growing supply of crafting stuff, while trying to make it fit into a very small space.
1. ScrapRack - This cool gadget has totally changed my organizational habits for my scrapping materials.
2. Project Life - I have been working on weekly pages, which may have been a bit ambitious. I often forget to take photos so I fill my pages with fun things like what we binge watched and snapshots of gas prices. It has been a crazy year for petroleum pricing.
Wow this stuff can take up a lot of space. Eight core kits and several mini and theme kits later, I was left wondering how on earth to keep it organized and also be at my fingertips. My Project Life Card Storage
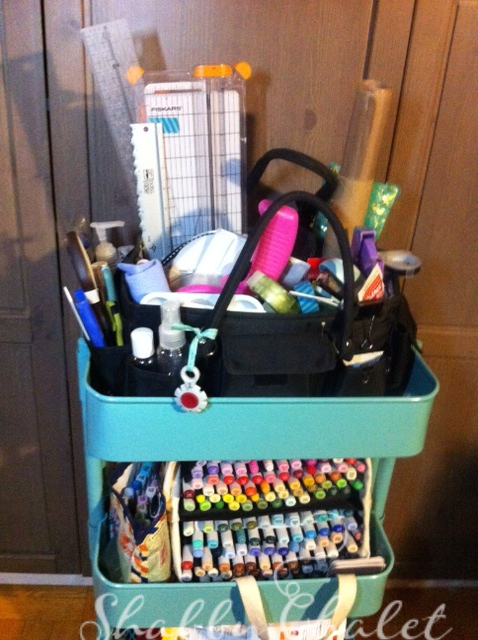
3. Raskog Cart from Ikea. I will write a blog later about what I have put in my cart.
4. Button Maker - I use a lot of buttons and this has helped me immensely over the past year. It has added joy to my life to be able to put my design knowledge to good use.
5. Silicon mat from Heidi Swapp
6. Washi Tape Organization - My washi collection grew from a small basket of a few assorted colours to a medium sized colander full. Originally when the collection was smaller, I had it organized by colour (my OCD side made me do it), since it has grown, it is now just tossed into my colander and I just dig through it. Eventually, when I have enough room, I would like a Harbor Freight 4 bin revolving tray for Washi, sprays, diminutional paint and glitter glue.
7. Rubber Stamp Catalogue
I will report back in another year with a new list of my fave things. Hope you all have a very productive and creative New Year.
Last year I listed a few of my fave things that have helped save me time and space with my organizing. Since then I have added a few new things to my ever growing supply of crafting stuff, while trying to make it fit into a very small space.
1. ScrapRack - This cool gadget has totally changed my organizational habits for my scrapping materials.
2. Project Life - I have been working on weekly pages, which may have been a bit ambitious. I often forget to take photos so I fill my pages with fun things like what we binge watched and snapshots of gas prices. It has been a crazy year for petroleum pricing.
Wow this stuff can take up a lot of space. Eight core kits and several mini and theme kits later, I was left wondering how on earth to keep it organized and also be at my fingertips. My Project Life Card Storage
3. Raskog Cart from Ikea. I will write a blog later about what I have put in my cart.
- Top shelf - Tool caddy
- Middle shelf - Copic Markers
- Bottom shelf - Sizzix, original red
4. Button Maker - I use a lot of buttons and this has helped me immensely over the past year. It has added joy to my life to be able to put my design knowledge to good use.
5. Silicon mat from Heidi Swapp
6. Washi Tape Organization - My washi collection grew from a small basket of a few assorted colours to a medium sized colander full. Originally when the collection was smaller, I had it organized by colour (my OCD side made me do it), since it has grown, it is now just tossed into my colander and I just dig through it. Eventually, when I have enough room, I would like a Harbor Freight 4 bin revolving tray for Washi, sprays, diminutional paint and glitter glue.
7. Rubber Stamp Catalogue
I will report back in another year with a new list of my fave things. Hope you all have a very productive and creative New Year.
Subscribe to:
Posts (Atom)