Saturday, 14 February 2015

Valentine Gift 2015

Every Valentine's Day  I try to find something special for my husband.  He was in the music industry when he was young and I found this red 45 adapter in his things.  Normally these adapters were yellow plastic.  I thought this would be something that would be fun to frame.


I used silicone sealant to mount the adapter onto a linen canvas art board and opted for no glass for my float mount.

Thursday, 12 February 2015

Valentines in Project Life Pages

As Valentines Day approaches, don't throw away your Valentines, they can be fun to look after the years pass.  A fun place to save some of your or your children's Valentines is to put them in Project Life pocket pages.  I have opted for Design F for my vintage Valentines.

If some are too large, you can split them up into two pockets (depending on which page design you choose.)  You can also scan them and shrink them to size.

I think kids Valentines from this year will be full of Frozen cards. 


Thursday, 1 January 2015

January 2015 - Happy New Year

I can't believe that January has rolled around so quickly, it seems as thought I just got use to writing 2014.


Last year I listed a few of my fave things that have helped save me time and space with my organizing.  Since then I have added a few new things to my ever growing supply of crafting stuff, while trying to make it fit into a very small space.

1.  ScrapRack - This cool gadget has totally changed my organizational habits for my scrapping materials.

2.  Project Life - I have been working on weekly pages, which may have been a bit ambitious.  I often forget to take photos so I fill my pages with fun things like what we binge watched and snapshots of gas prices.  It has been a crazy year for petroleum pricing.

Wow this stuff can take up a lot of space.  Eight core kits and several mini and theme kits later, I was left wondering how on earth to keep it organized and also be at my fingertips.  My Project Life Card Storage

3.  Raskog Cart from Ikea.  I will write a blog later about what I have put in my cart.
  • Top shelf - Tool caddy
  • Middle shelf - Copic Markers
  • Bottom shelf - Sizzix, original red

4. Button Maker - I use a lot of buttons and this has helped me immensely over the past year.  It has added joy to my life to be able to put my design knowledge to good use.

5.  Silicon mat from Heidi Swapp

6.  Washi Tape Organization - My washi collection grew from a small basket of a few assorted colours to a medium sized colander full.  Originally when the collection was smaller, I had it organized by colour (my OCD side made me do it), since it has grown, it is now just tossed into my colander and I just dig through it.  Eventually, when I have enough room, I would like a Harbor Freight 4 bin revolving tray for Washi, sprays, diminutional paint and glitter glue.

7.  Rubber Stamp Catalogue

I will report back in another year with a new list of my fave things.  Hope you all have a very productive and creative New Year.


Monday, 17 November 2014

Copic Markers ~ Sketch vs. Ciao

I see a lot of people wondering which type of Copic Markers they should invest in and what the difference is between the styles of markers.


These are NOT your Crayola Markers.   Copic Markers are professional markers that are created for creative people.  They can run anywhere from 5.50 - 9.00   depending on where you shop.  Many people ask me if they are worth the price.  ... the answer is YES!  They are refillable and designed for a lifetime of use.  Copic Markers do not dry out when in  use and come with a 3 year shelf-life guarantee.

This is everything you need to know about Copic Markers. 

Copic is a brand of alcohol markers that has been developed by the .Too Corporation in Japan.  The popular markers are used by fashion designers, architects, illustrators, animators, cartoonists, hobbyists and crafters.  They have been in business for over 25 years and the colours they originally produced still have the exact same formula today.

The Copic Colour System is exclusively designed by Copic and includes 358 colours.

Super Brush Nib  - unique flexible brush nib that allows for smooth blending.  No other brush marker on the market has this type of feel and quality.

Copic Original
  • Available in 214 colours
  • Fine and chisel nibs
  • Can fit into the airbrush saddle
Copic Sketch
  • Available in 358 colours
  • Super brush and chisel nibs
  • Barrel is oval
  • Colour codes are embossed on the coloured cap ends
  • Can fit into the airbrush saddle
Copic Caio 
  • Available in 144 colours
  • Super brush and chisel nibs
  • Barrel is round
  • Coloured caps 
  • Numbers are on the side of the markers
  • Cannot fit into the airbrush saddle
Copic Wide
  • The Copic Wide is exactly what it promises - wide
  • Available in 36 colours
  • Different nibs are available 


Sketch vs. Ciao

These are the differences that I have observed between Sketch and Ciao markers.

Ciao
  • Ciao were designed for youth to have smaller and less expensive markers.  
  • Because I have both osteoarthritis and psoriatic arthritis I have a harder time opening the lids. 
  • They are round and have a tendency to roll off the table. 
  • Since the caps are just coloured you have to pull them out to see the colour number on the side of the marker.
  • I find that when they open they can leave little droplets of ink on my art project so open them away from your project.  
  • Hold less ink than the Sketch.
  • The inner cap plastic seems to catch on the chisel nibs and chews them up - I have to replace the chisel nibs on my Ciaos and have never replaced them on my other makers. 
Sketch
  • Oval design make the caps easy to twist off.
  • You can easily see the colour number on the cap.
  • The Sketch markers do not roll off the table.
  • Hold more ink.
  • Fit into the airbrush saddle.
Since they are the same nibs the difference that I find most noticeable is ease of use.  I definitely prefer working with the Sketch over the Ciao and feel that they are well worth the small difference in price.  I am slowly replacing my Ciao markers with Sketch.


Friday, 14 November 2014

Baby Layout

I created this scrapbook layout a couple of days ago and had to share.


I love the Silhouette Studio software and how it has helped me visualize my layouts and gives me cutting files at the same time.


I am able to fill each shape with a colour or a pattern to bring my layout to life.  If I am ambitious, I can also import my photos to see how it will look.  After I have chosen all of my papers and embellishments, I begin to cut my shapes and letters.

I used a photo of my daughter Julie when she was 6 months old.  She sat up for the very first time for the photographer so we have it all captured on film.

Wednesday, 29 October 2014

Metallic RGB Colours

Print and Cut is my favourite feature on my Cameo.  It can be a little bit frustrating trying to find the right colours, as the colour chart in the Studio software is a bit limiting.  With Christmas coming up I am always wishing that I could print with foil but unfortunately my printer doesn't have that capability.  Here are some RGB codes that will help you get close to having a metallic look.


Thursday, 18 September 2014

Copic Collection App

I recently saw someone on FaceBook giving away a couple of Copic Caio markers because they had purchased duplicates.  One easy fix for making these types of purchases is to add the Copic app to your smart phone.

Copic Collection is an app that I started using a couple of years after battling with a method to keep track of which markers and refills I owned and needed.

I love this app - Just click on the markers and various inks that you own and they light up on the screen.   In this screen shot it shows "stock" markers only (the items I own.)

As you can see I use all of the marker types.  My favourite markers are the sketch.  I find them easy to open with my arthritic hands and they don't roll off the table.


In this screen shot, I have it set to show all markers available and the markers that I have are lit up.

When there are 358 colours to collect it is hard to keep track of what you have.  I have been through hand written lists, the little Copic swatch book, and several hand colour charts - this little app, by far, has been the greatest tool for tracking marker and refill purchases that I have seen.
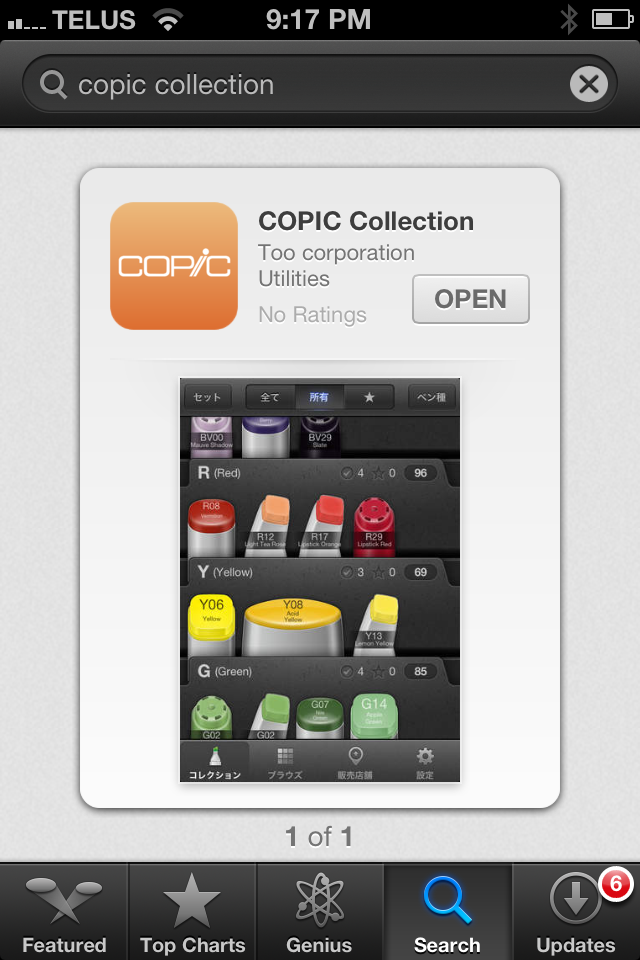
You can mark items on  your wish list with a star so when standing in front of a wall of markers you won't lose your focus and end up picking something that you don't need.

Copic Collection App
Go to the Copic Collection website here

Monday, 8 September 2014

Project Life Cards are Growing

My collection of Project Life cards seems to be growing.  What was once one ScrapRack Spinder has now become 6 Spinders.  I still love how easy it is to flip through the pages and see both the front and back of the cards.

My most recent adds are Heidi Swapp Project Life core kits, both Dreamy and Favorite Things.  I didn't care much for Favorite Things in the box but once I got a look at the cards, it has easily become my favourite set.


Bridal Party Flair Buttons


I recently made some buttons for a wedding that took place on the weekend.  I just got photos today and they look really cute.  Fun girls and fun dresses.


Photo by Thyme Photography in the Calgary, Alberta area.

Monday, 18 August 2014

Stamp Catalogue


This is a sneak peek at how I am updating my rubber stamp catalogue.  I am in the middle of revamping and very slowly making progress.   I have far too little space to store them so I need to have them super organized and easy to find.

The categories are arranged by Alpha/Numberic - Theme - Calendar. (Thank you Tiffany for this)

I only have space to shelve my favourites and the rest sit in Rubbermaid under bed totes.  In light pencil under each image I record the location of where I have stored the stamp so I can quickly find it.

I consider myself a purist where rubber stamps are concerned.  I love the crisp lines that you get with rubber as well as the vintage look as they sit on my shelf.

I made the shelf from 1 x 4's and used cider vinegar and steel wool to get a weathered look for the pine.

I like to hand stamp my catalogue so that I know the exact size when designing a new project.   I find that many of my friends are using digital images to reference their stamps - I prefer to have the actual size.

Once my cataloguing is finished I will be photocopying each sheet and putting a copy of my catalogue in the corresponding section of my ScrapRack.


 This is what my current catalogue looks like.  For my facelift, I have added a header with the category and a footer with my name.


My clear stamps are in a binder with zippered pouches.  My binder is constantly shrinking and has just grown too small for my stamps.  I am slowly migrating them to individual zippered polypropylene pockets and will be labelling them with numbed so the location can be referenced in my stamp catalogue.