Monday, 17 November 2014

Copic Markers ~ Sketch vs. Ciao

I see a lot of people wondering which type of Copic Markers they should invest in and what the difference is between the styles of markers.


These are NOT your Crayola Markers.   Copic Markers are professional markers that are created for creative people.  They can run anywhere from 5.50 - 9.00   depending on where you shop.  Many people ask me if they are worth the price.  ... the answer is YES!  They are refillable and designed for a lifetime of use.  Copic Markers do not dry out when in  use and come with a 3 year shelf-life guarantee.

This is everything you need to know about Copic Markers. 

Copic is a brand of alcohol markers that has been developed by the .Too Corporation in Japan.  The popular markers are used by fashion designers, architects, illustrators, animators, cartoonists, hobbyists and crafters.  They have been in business for over 25 years and the colours they originally produced still have the exact same formula today.

The Copic Colour System is exclusively designed by Copic and includes 358 colours.

Super Brush Nib  - unique flexible brush nib that allows for smooth blending.  No other brush marker on the market has this type of feel and quality.

Copic Original
  • Available in 214 colours
  • Fine and chisel nibs
  • Can fit into the airbrush saddle
Copic Sketch
  • Available in 358 colours
  • Super brush and chisel nibs
  • Barrel is oval
  • Colour codes are embossed on the coloured cap ends
  • Can fit into the airbrush saddle
Copic Caio 
  • Available in 144 colours
  • Super brush and chisel nibs
  • Barrel is round
  • Coloured caps 
  • Numbers are on the side of the markers
  • Cannot fit into the airbrush saddle
Copic Wide
  • The Copic Wide is exactly what it promises - wide
  • Available in 36 colours
  • Different nibs are available 


Sketch vs. Ciao

These are the differences that I have observed between Sketch and Ciao markers.

Ciao
  • Ciao were designed for youth to have smaller and less expensive markers.  
  • Because I have both osteoarthritis and psoriatic arthritis I have a harder time opening the lids. 
  • They are round and have a tendency to roll off the table. 
  • Since the caps are just coloured you have to pull them out to see the colour number on the side of the marker.
  • I find that when they open they can leave little droplets of ink on my art project so open them away from your project.  
  • Hold less ink than the Sketch.
  • The inner cap plastic seems to catch on the chisel nibs and chews them up - I have to replace the chisel nibs on my Ciaos and have never replaced them on my other makers. 
Sketch
  • Oval design make the caps easy to twist off.
  • You can easily see the colour number on the cap.
  • The Sketch markers do not roll off the table.
  • Hold more ink.
  • Fit into the airbrush saddle.
Since they are the same nibs the difference that I find most noticeable is ease of use.  I definitely prefer working with the Sketch over the Ciao and feel that they are well worth the small difference in price.  I am slowly replacing my Ciao markers with Sketch.


Friday, 14 November 2014

Baby Layout

I created this scrapbook layout a couple of days ago and had to share.


I love the Silhouette Studio software and how it has helped me visualize my layouts and gives me cutting files at the same time.


I am able to fill each shape with a colour or a pattern to bring my layout to life.  If I am ambitious, I can also import my photos to see how it will look.  After I have chosen all of my papers and embellishments, I begin to cut my shapes and letters.

I used a photo of my daughter Julie when she was 6 months old.  She sat up for the very first time for the photographer so we have it all captured on film.

Wednesday, 29 October 2014

Metallic RGB Colours

Print and Cut is my favourite feature on my Cameo.  It can be a little bit frustrating trying to find the right colours, as the colour chart in the Studio software is a bit limiting.  With Christmas coming up I am always wishing that I could print with foil but unfortunately my printer doesn't have that capability.  Here are some RGB codes that will help you get close to having a metallic look.


Thursday, 18 September 2014

Copic Collection App

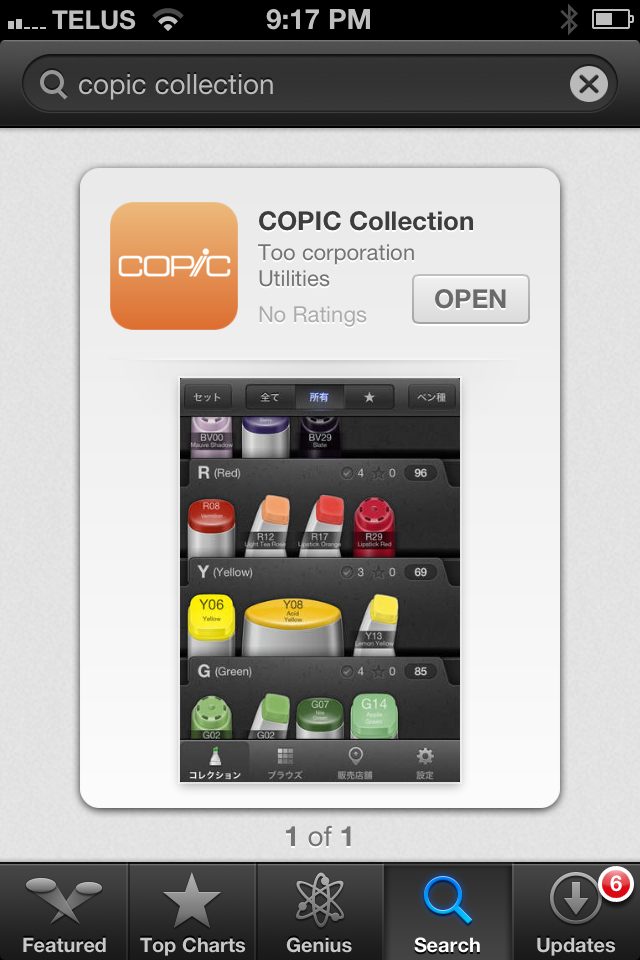
I recently saw someone on FaceBook giving away a couple of Copic Caio markers because they had purchased duplicates.  One easy fix for making these types of purchases is to add the Copic app to your smart phone.

Copic Collection is an app that I started using a couple of years after battling with a method to keep track of which markers and refills I owned and needed.

I love this app - Just click on the markers and various inks that you own and they light up on the screen.   In this screen shot it shows "stock" markers only (the items I own.)

As you can see I use all of the marker types.  My favourite markers are the sketch.  I find them easy to open with my arthritic hands and they don't roll off the table.


In this screen shot, I have it set to show all markers available and the markers that I have are lit up.

When there are 358 colours to collect it is hard to keep track of what you have.  I have been through hand written lists, the little Copic swatch book, and several hand colour charts - this little app, by far, has been the greatest tool for tracking marker and refill purchases that I have seen.

You can mark items on  your wish list with a star so when standing in front of a wall of markers you won't lose your focus and end up picking something that you don't need.

Copic Collection App
Go to the Copic Collection website here

Monday, 8 September 2014

Project Life Cards are Growing

My collection of Project Life cards seems to be growing.  What was once one ScrapRack Spinder has now become 6 Spinders.  I still love how easy it is to flip through the pages and see both the front and back of the cards.

My most recent adds are Heidi Swapp Project Life core kits, both Dreamy and Favorite Things.  I didn't care much for Favorite Things in the box but once I got a look at the cards, it has easily become my favourite set.


Bridal Party Flair Buttons


I recently made some buttons for a wedding that took place on the weekend.  I just got photos today and they look really cute.  Fun girls and fun dresses.


Photo by Thyme Photography in the Calgary, Alberta area.

Monday, 18 August 2014

Stamp Catalogue


This is a sneak peek at how I am updating my rubber stamp catalogue.  I am in the middle of revamping and very slowly making progress.   I have far too little space to store them so I need to have them super organized and easy to find.

The categories are arranged by Alpha/Numberic - Theme - Calendar. (Thank you Tiffany for this)

I only have space to shelve my favourites and the rest sit in Rubbermaid under bed totes.  In light pencil under each image I record the location of where I have stored the stamp so I can quickly find it.

I consider myself a purist where rubber stamps are concerned.  I love the crisp lines that you get with rubber as well as the vintage look as they sit on my shelf.

I made the shelf from 1 x 4's and used cider vinegar and steel wool to get a weathered look for the pine.

I like to hand stamp my catalogue so that I know the exact size when designing a new project.   I find that many of my friends are using digital images to reference their stamps - I prefer to have the actual size.

Once my cataloguing is finished I will be photocopying each sheet and putting a copy of my catalogue in the corresponding section of my ScrapRack.


 This is what my current catalogue looks like.  For my facelift, I have added a header with the category and a footer with my name.


My clear stamps are in a binder with zippered pouches.  My binder is constantly shrinking and has just grown too small for my stamps.  I am slowly migrating them to individual zippered polypropylene pockets and will be labelling them with numbed so the location can be referenced in my stamp catalogue.


Saturday, 2 August 2014

Bonjour Flair - Give Away

If you are looking to add a bit of a Parisian flair to your scrapbook pages, Project Life pages or cards - this might be what you need.  This is my latest set of flair at the request of some Canadian friends who haven't been able to find many buttons with French on them.


This week I am giving away this set of flair.  To enter please leave a comment in the comment section  below.  The winner will be announced on August 10th (my daughters birthday)
Shipping is limited to USA and Canada.  I will be including a couple of new designs that I am working on.  Good luck everyone.

Update:  Random number generator says post 3 is the winner.  Please email me at kathryn@shabbychalet.com.


Friday, 1 August 2014

Silhouette Introduces PixScan Technology

I'm so excited, I can't wait to get this into my hands.

Silhouette America has just introduced a new technology called PixScan.  ccording to their website this is what it can do for us.

You can:


  • Turn hand drawings into cut files
  • Turn fabric and paper into digital patterns 
  • Replicate a pattern at its original size
  • Turn your stamp collection into cut files
  • Save scanned or photograph images into your personal digital library


You will need:


  1. An updated version of Silhouette Studio software (V3.1 or higher)
  2. A PixScan cutting mat
  3. Digital camera


All you will need to do is place your material onto the PixScan mat and capture an image of the material.  Then upload the image to Silhouette Studio and cut the desired lines.  You can cut virtually anything for designs that you have that aren't digital.  If you have patterned paper that you would like to cut out - now it is possible to cut with your Silhouette Studio software.

My rubber stamp collection is revving up to be pulled out of the closet.  I no longer need to spend money on dies to match stamps and I will definitely be looking at sheets of paper differently from now on.

I can hardly wait until the PixScan mats are available - this is a game changer.


Tuesday, 3 June 2014

Project Life 12 x 12 Photo - Toronto


I have spent a while working with Project Life pocket pages and wanted to do something a bit different.  I took a favourite photo of Toronto and shipped it off to Costo.ca to create a 12 x 12    specialty size photo.   The Canadian price is 4.99 and they will have it done by noon the next day after uploading.   I usually never give them till noon the next day and run off to pick up my photos with in the hour or first thing in the morning, if I uploaded overnight --- they have always had them done.

Because my photo was formatted for a 4 x 6 ratio, Costco will give you the option to crop your photo to make it square.  I decided to use D style pages because of the height of the CN Tower.  I didn't want to cut it 3 times that the A page would have required.


While cropping online to fit the 12 x 12 format I tried to keep the CN Tower in the right one third of the photo so that it would fit in the centre of the right pockets.  I was quite happy when I started to cut the photo into 4" strips and the tower was fairly centred. 

First I measured the photo to make sure it was exactly 12 x 12 (it was), then I cut 3 vertical strips of 4".  The outer two strips were cut in half at 6" making 2- 4 x 6" photos.  The Centre strip I cut into 4 - 3 x 4 photos.


Next I rounded my corners and put the puzzle pieces back in the correct order and just popped my photos in the pockets.  I was absolutely thrilled with my page and can't wait to try a baby photo.

Things to keep in mind when using a 12 x 12 photo:

1. Most photos will need to be cropped to fit a square.
2. Pick the type of page you want to put your 12 x 12 in.
3. Make sure the style of page fits the type of photo
4. Be mindful of where the cuts on your photo will be.  You won't want a cut to go through eyes on a face.  Try to keep most of the face within on of the pocket sizes.


Monday, 2 June 2014

Canada Day Flair


Living in Canada, I find that we just don't have enough fun Canadian themed embellishments.  This is the first in a series of Canadian fun stuff... eh!

Stay tuned.

Hope you all have a fun and safe Canada Day.


Monday, 24 March 2014

Project Life Card Organizing

Update:  Here goes - I have resisted the temptation to organize my Project Life cards in the cute Ikea Raskog cart.  Instead, I have loaded a case of Becky Higgins pages with my Project Life cards.  I have decided to go ahead and use my ScrapRack to have full view of the card designs and colours without having to flip through hundreds of cards each time I work on a page layout.

Number of Pocket Pages

Theme Sets of 40 - 3 pages
Theme Sets of 60 - 4 pages
Core Kits 660 - 10 Pages

I have used a Project Life clear divider to to section the kits.  I will be able to easily view and reference which kit the cards have come from.  Multiples from the Core Kits will stay in their original box.

The next class or workshop will be so easy to pack for, I just grab my ScarpRack Spinder for Project Life.

Thursday, 20 March 2014

ScrapRack

My ScrapRack arrived today.  Since I have been organizing with the 2014 Organizational Challenge with Tiffany Spaulding, I already had my papers, embellishments and scraps in page protectors.  It was an easy 30 minute set up transferring everything to Spinders and placing on the base.  Unfortunately I only have room for one base, my other base will go into a rolling cart for taking to classes, workshops and crops.  The system is designed for four categories:  Alpha/Numeric; Themes; Calendar; Rainbow.

I repurposed a lot of my old Creative Memories Sticker and Pocket pages for my Theme Section.  I still have more paper to sort and decisions about what else will go into my ScrapRack named *Precious*

My next challenge is to find a home for her.

Sunday, 9 March 2014

Project Life Organization

I am struggling to find a storage solution for my Project Life journal cards.  I have recently been organizing my "stuff" ScrapRack style thanks to Tiffany Spaulding's 2014 Get Organized Challenge.  My dilemma is do I store the journal cards by kit name in a box with tabbed dividers or do I store them in a ScrapRack.

Project Life Midnight Core Kit
Today I did a test to see how many page protector sheets it will take to store one of each card from a Becky Higgins, Project Life Core Kit.  The number of pages is 10.  It won't take many Core, Mini and Theme kits to to fill 100 pages or even a full ScrapRack.  There are multiples of each design in a core kit so I will still need a box to carry the extra cards - I haven't had luck locating the perfect box yet.

I will keep you posted as to what I find and decide to use for my storage solution.

Saturday, 15 February 2014

Valentine Day Card Tic Tac Toe


I used the Silhouette Cameo to produce most of this card

Red hearts:  Silhouette print and cut
Black lines around hearts: Silhouette black sketch pen feature
Writing & XOX:  Silhouette black sketch pens
Background card stock in black and white:  Cut to exact size with the Silhouette Cameo

Add some washi tape and bakers twine with a flat back button onto a kraft card and you have a cute Valentines Day Card.

Even the button was a print & cut and sketch pens before the circle was cut to fit into the button machine.


Friday, 14 February 2014

Valentines Day

Pink Lemonade and Sugar Cookies for Valentines


I hope you all are having a wonderful Valentines day

This is a favourite recipe that I got from my friend Denise many years ago.  When I have dropped them off on door steps, husbands have said, "find out who made them at all costs and get the recipe."

Sugar Cookies

 ½ cup                Butter or Margarine
½ cup                White Sugar
1                        Egg Yolk Slightly Beaten
½ tsp                 Vanilla
1 ½ cups            Flour
1 ½ tsp              Baking Powder
¼ tsp                 Salt
3 tbsp                Milk

Method
Cream butter – add sugar
Add egg yolk – mix well.
Add dry ingredients alternately with milk.
Add vanilla.  Chill dough thoroughly.
Roll  ¼” thick on lightly floured surface.
Cut with cookie cutters.
Bake – ungreased cookie sheet 375ยบ 8 – 10 min

Don't over bake

Wednesday, 22 January 2014

Nativity Card


This is a card that I made for my Card Swap Group last Christmas.   With all of the kerfuffle about Christmas, I wanted to make a card that expressed more about the simplicity of the true meaning of Christmas.

Silhouette Design ID #14775

Materials
Kraft card
Corrugated green card stock
Lime green raffia - from Creative Bag
Little wooden star painted yellow
Studio G glitter glue - yellow

The glue holding these small parts of the nativity together is of course The Best Glue Ever - this has been such a help to me with gluing my tiny pieces of paper.

Happy New Year

It has been 4 months since I last posted a blog entry.  Family matters and busy schedules have kept me from posting.  I am back and will get caught up on all of the things I have to post.

Happy New Year

With it being the beginning of a New Year I thought I would post a few things about some of my favourite tools and things I have learned from others.

1. Silhouette America's Cameo - has saved me from having to store great numbers of punches, border punches, dies and paper trimmers.. and the dreaded cartridges. I can also make so many of my own stickers and embellishments custom as per the need.

2. Copic Certification Class - by using my markers or the Copic Airbrush I only have to buy white flowers, ribbons & clear gems. I can have perfectly matched ribbon, flowers and gems for all of my scrapbooking and Papercrafting projects.
Learned to create a chart of markers that belong in each 72 slot wallet that I have so I can know immediately if one is missing and which one.  I also put K & Company Smash Whale Tape around my markers so that I can easily identify which marker if mine if they wander away at a class or crop.

3. ScrapRack - I don't have space for one at the moment but I have learned to get rid of all of my embellishment jars and boxes and organize my embellishments by colour with all of my patterned, single sheets and scraps of paper. Now housed in multiple Project Life 12 x 12 binders to be transferred as soon as I have a place for a ScrapRack.  Things are so much easier to find when they are organized all in one place.  Thank you Tiffany.

4. Ikea - thank heavens they had the wisdom to create shelving units that are larger than 12" Expedit 

5. Scotch - my ATG goes everywhere I do and my papers no longer pop off my projects after a few page turns.

6. ScraPerfect - "The Best Glue Ever" the wet glue I have fallen in love with for both pieces of papers and embellishments that are too small for my ATG and for resticking my Silhouette mat. (be sure to watch the video on the Best Glue Ever  page)

7. I have always been one to Catalogue my stamps, Stickles, stamp pads and marker colours and keep them in a handy binder for quick reference and the location where I have them stored. (long time stamp collector - I'm a purist and love the wood mounted rubber). The majority of my stamp pads are the original pads made by Ranger and I was lucky enough to get large bottles of ink for reining.

8. Embossing folders pressed onto larger paint chips, lightly sanded
to see the design easily... stored in my traveling tool tote for quick reference to my embossing folders to help me with my projects - otherwise i forget what I have.

These  are a few of the things that have helped me to organize my tools and products in a very small space in a tiny apartment and to work more effectively.   My only real issue is where to put a ScrapRack and how to store all of those paper stacks that I love so much.

May all of you have a very productive and organized year.